 FlipTrip Team
How do you usually start planning a trip?
Be honest. A lot of people open twelve tabs, save three Reels they’ll never watch again, and somehow end up with the same café every influencer already filmed. Others text a friend who lived there for a year and get a voice note that actually helps.
That second path is the one we built FlipTrip around.
We think recommendations from friends, people you follow, colleagues, that cousin who spent a summer in Lisbon, carry more weight than another generic “top 10.” Not because strangers on the internet are wrong. Because the people who know your taste — and know the city — cut through the noise faster.
FlipTrip is a trip planner for that habit. You ask. They reply with places. You turn the keepers into days on a map.
Works best on desktop, where the map and inbox are easiest to see side by side. Mobile web is already comfortable for sharing a link and dropping tips on the go — and an iPhone app is on the way.
You already do this. We just gave it a home
Think about the last time you mentioned a city out loud. Someone said “oh you have to go to…” and you half-remembered the name an hour later. Or you dropped a Google Maps pin into WhatsApp and lost it in the chat scroll.
That’s not a rare quirk. It’s how trips actually get shaped — messy, social, a little chaotic. FlipTrip doesn’t replace that. It catches it.
Friends don’t need an account. They open your link, drop a spot, write why it matters, send. You see everything in one inbox. Then you decide what belongs on Day 1 and what stays a maybe.
Three steps, start to finish
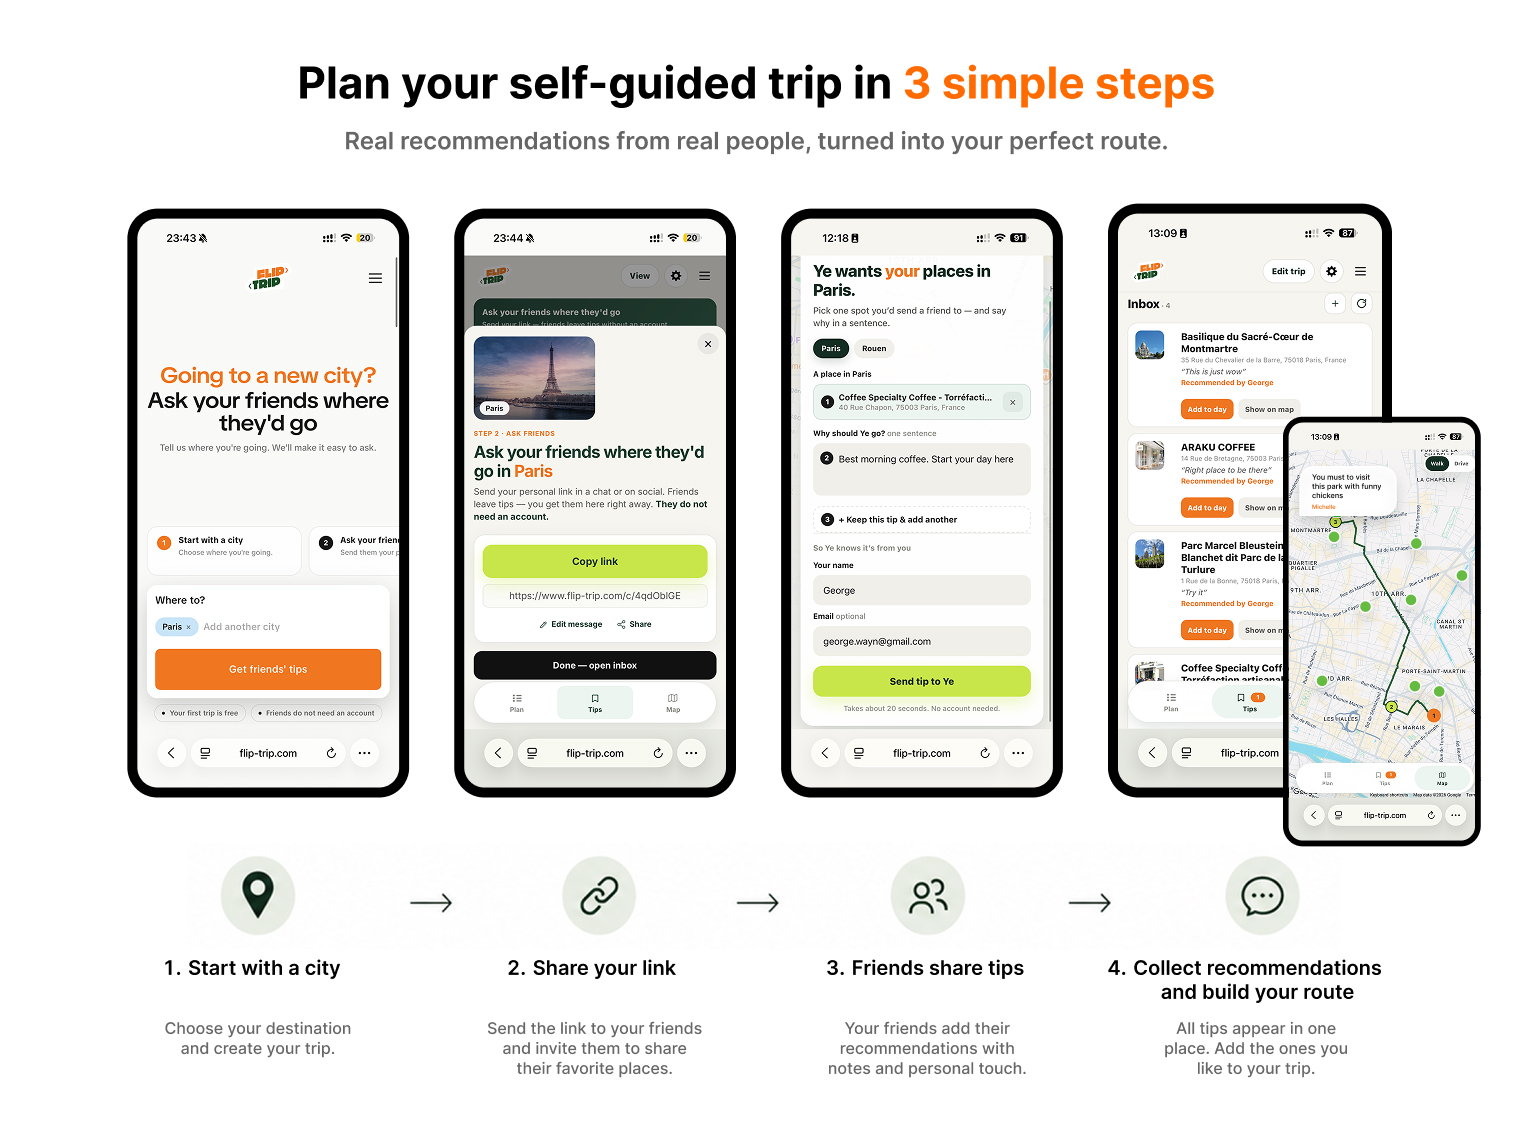
1. Pick a city
You start with the obvious question: where are you going? One city or a few. FlipTrip opens a trip and puts it on the map.
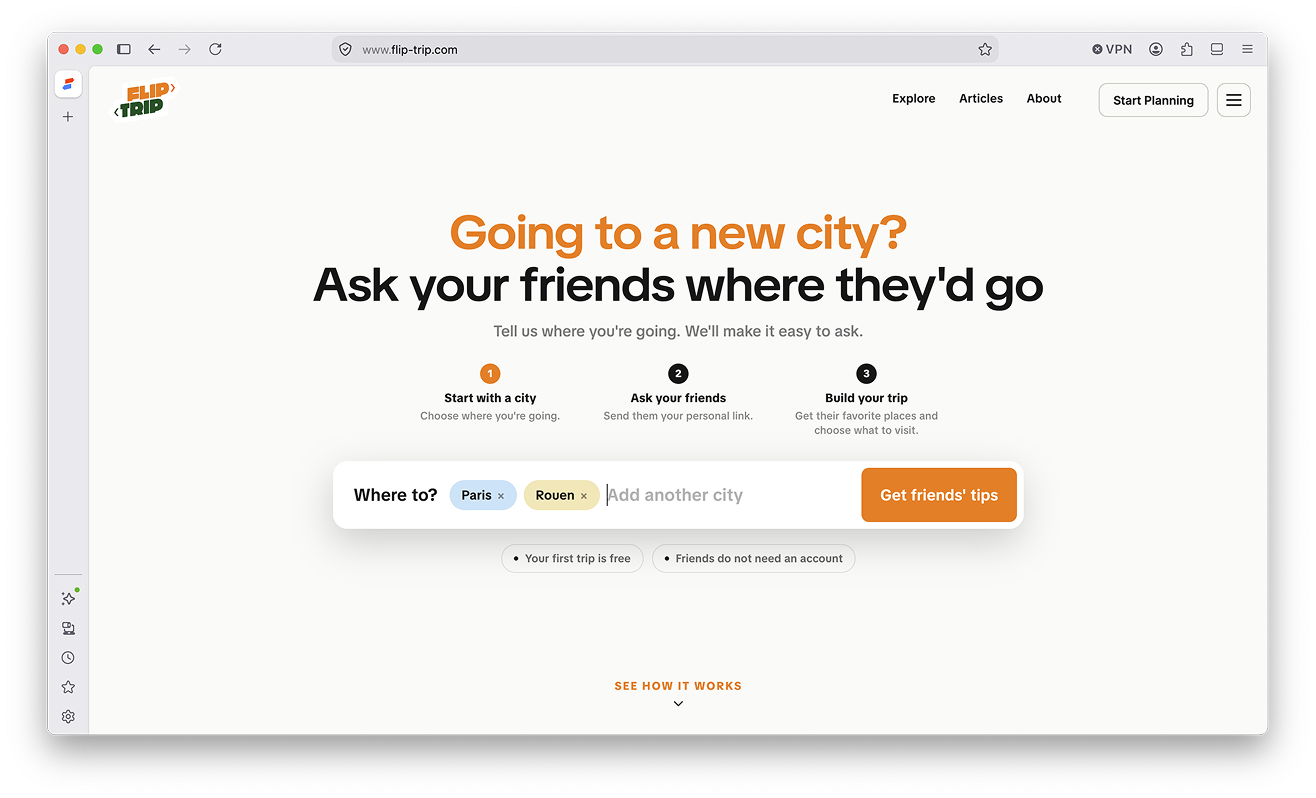
No 40-field form. Just the place. Your first trip is free.
2. Share a tips link
This is the part people skip when they plan alone — and the part that changes the trip.
FlipTrip gives you a personal link. Paste it into a group chat, a Story, a newsletter, a Discord or Facebook community around food / running / photography — wherever the people who actually know that city hang out. Something like: “Off to Paris soon — drop anything you’d go back for.”
Don’t stop at a couple of close friends. The more relevant people who see the link, the better the inbox gets — especially if someone shares it with their own followers or posts it in a niche community.
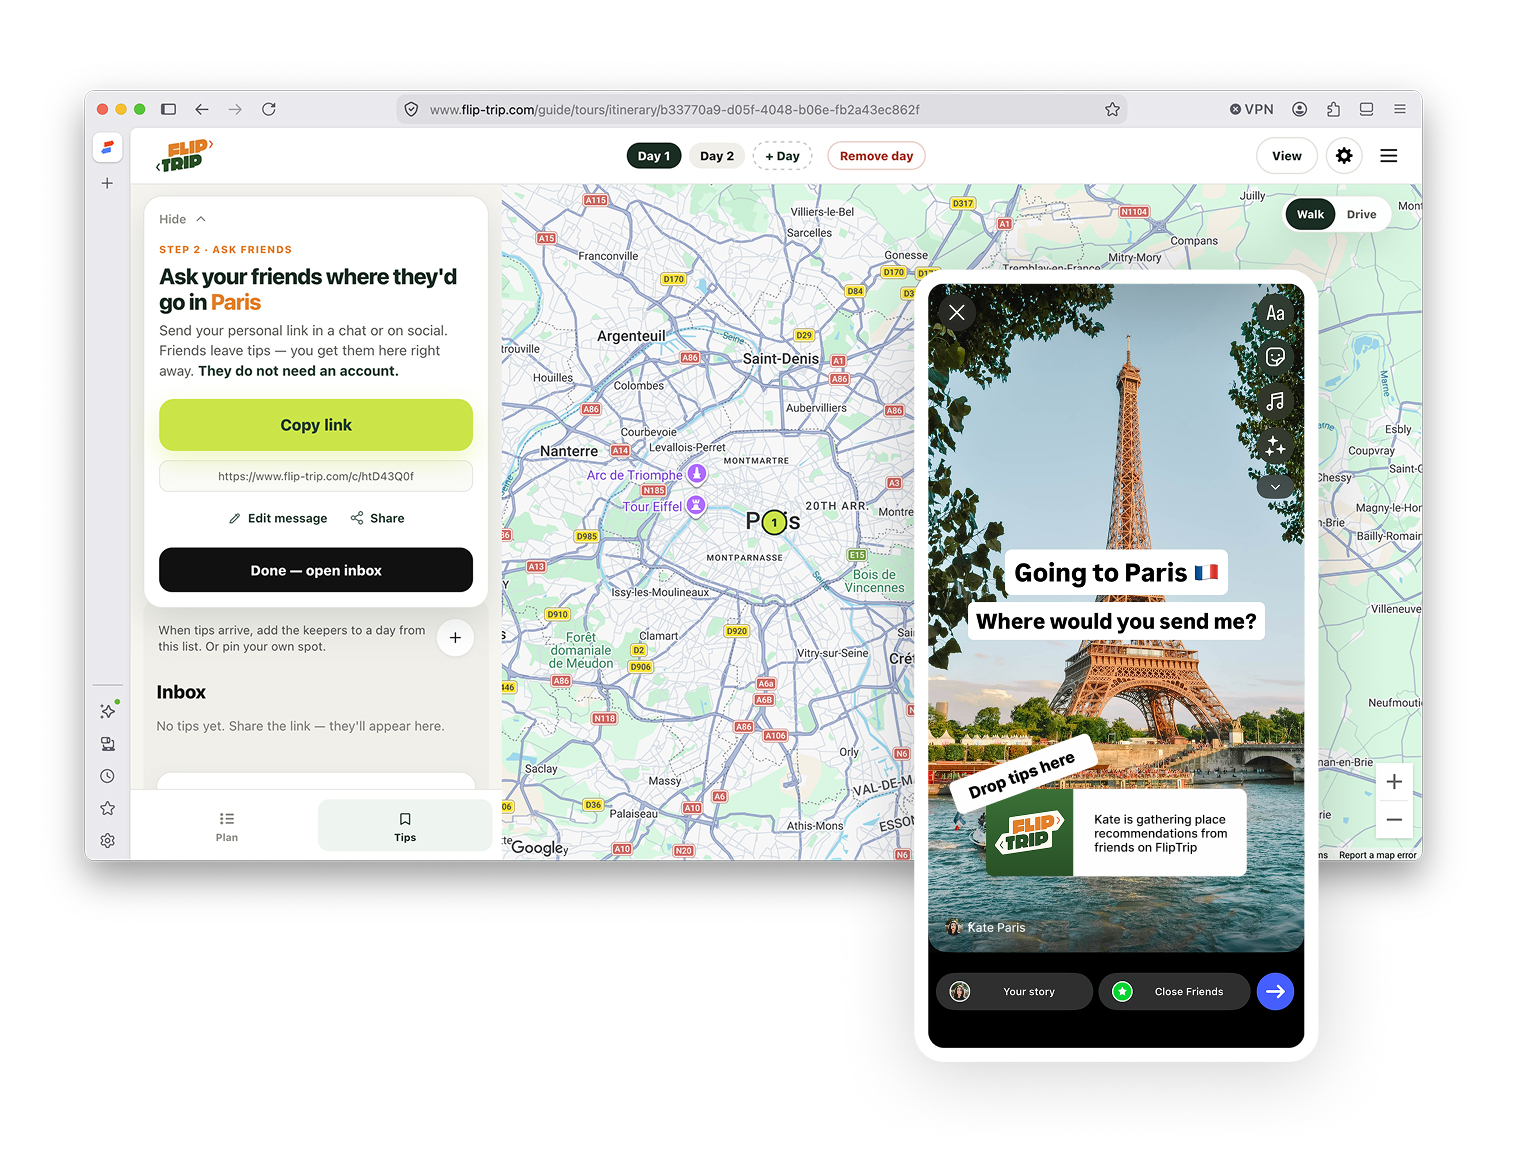
They don’t create a password. They don’t download an app. They leave a place and a short note. Tips land in your inbox as they come in.
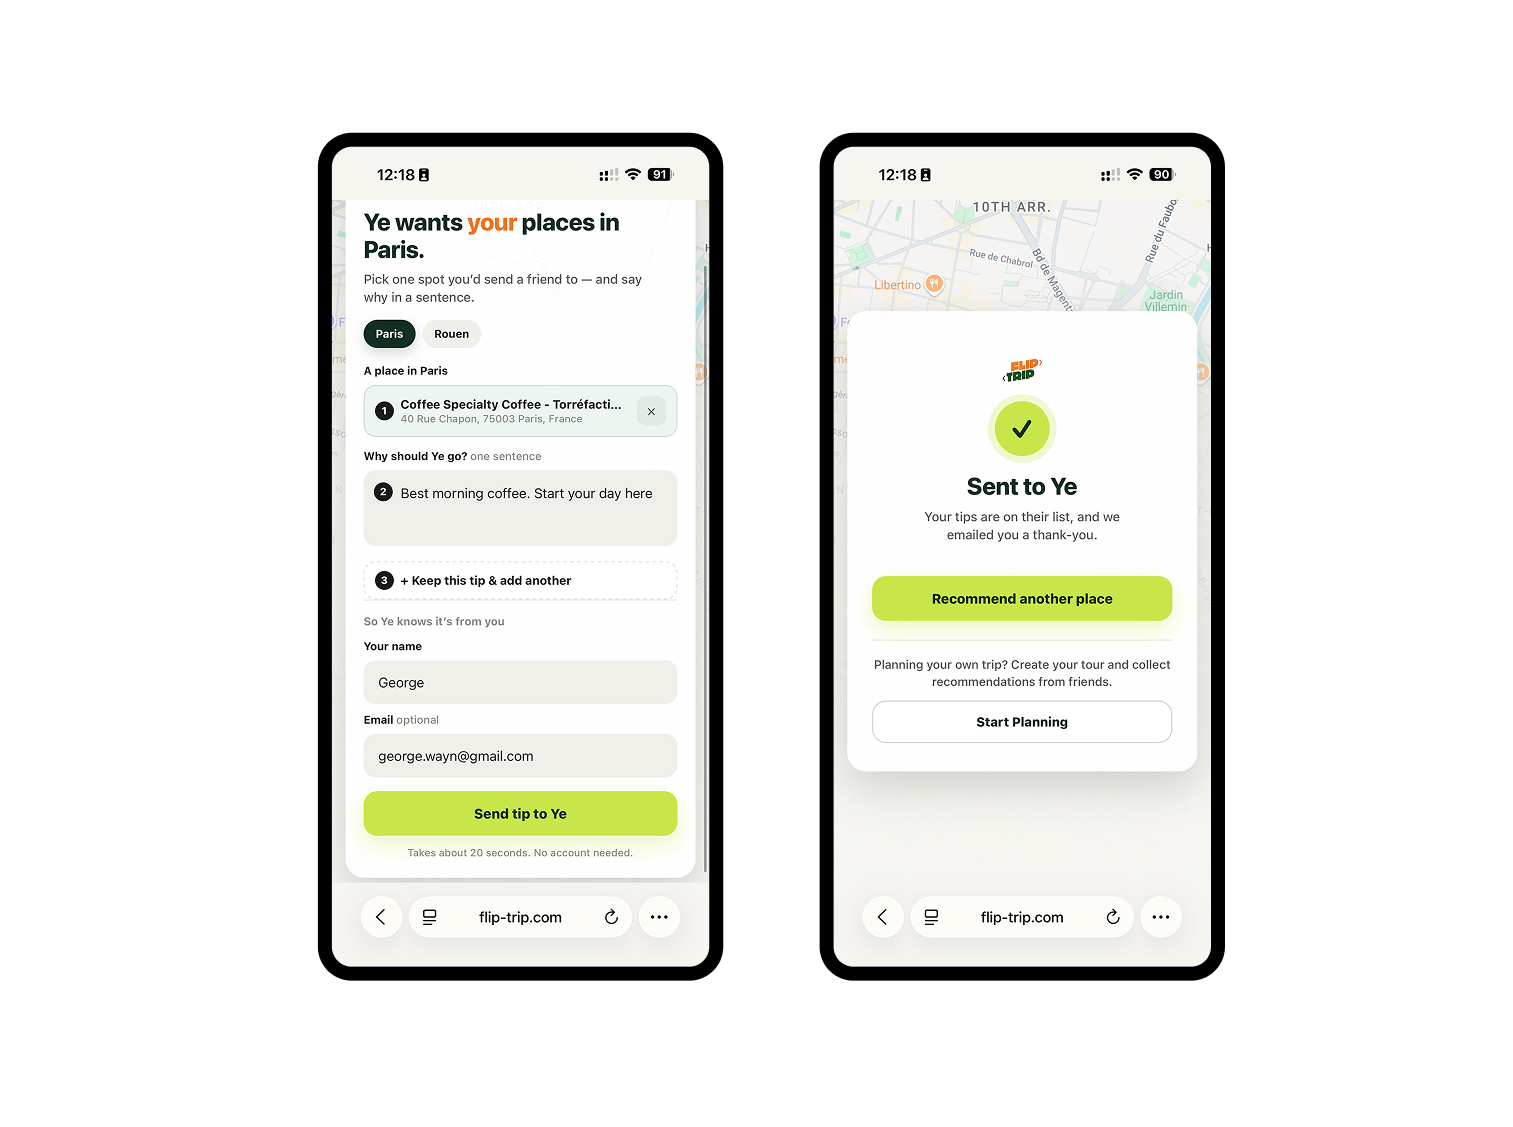
If you’ve ever asked “where should we eat?” in a group chat and gotten five conflicting answers, this feels familiar — only the answers don’t disappear under stickers and memes.
3. Build the route from what you got
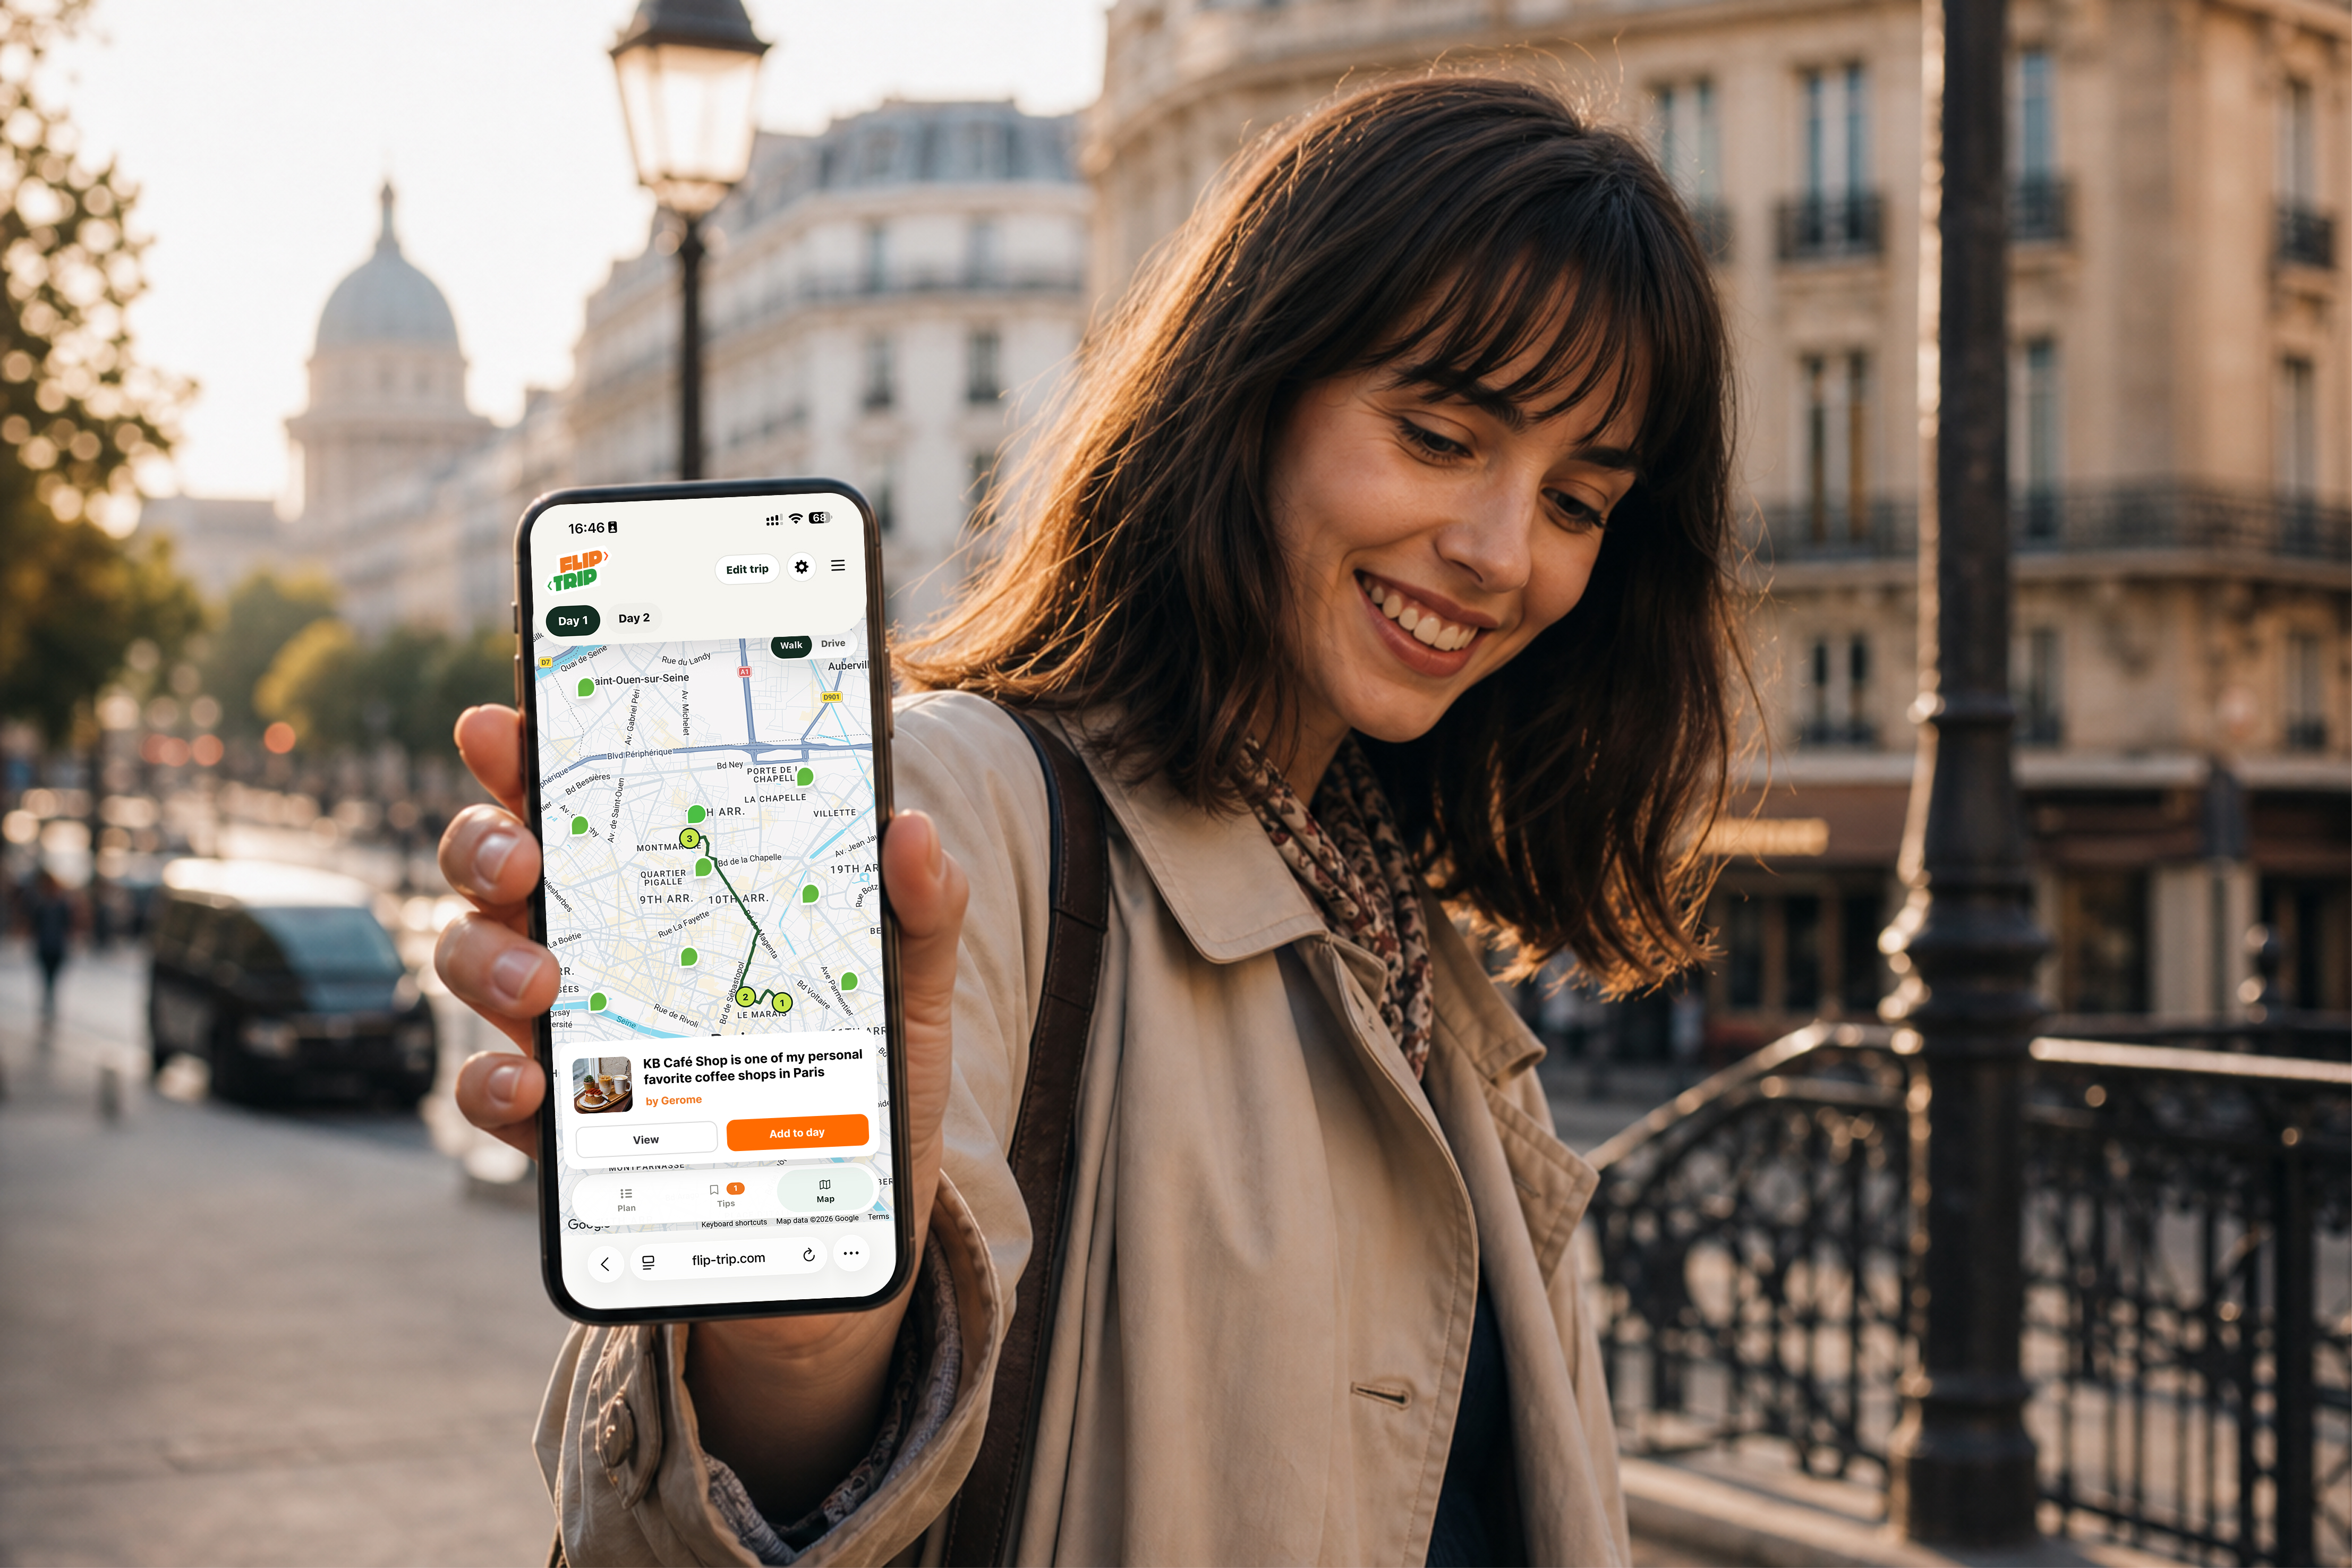
Keep what fits. Skip the rest. Drag places into days. Add your own stops when you want. The map walks with you — walk or drive — so the plan isn’t a screenshot of a spreadsheet.
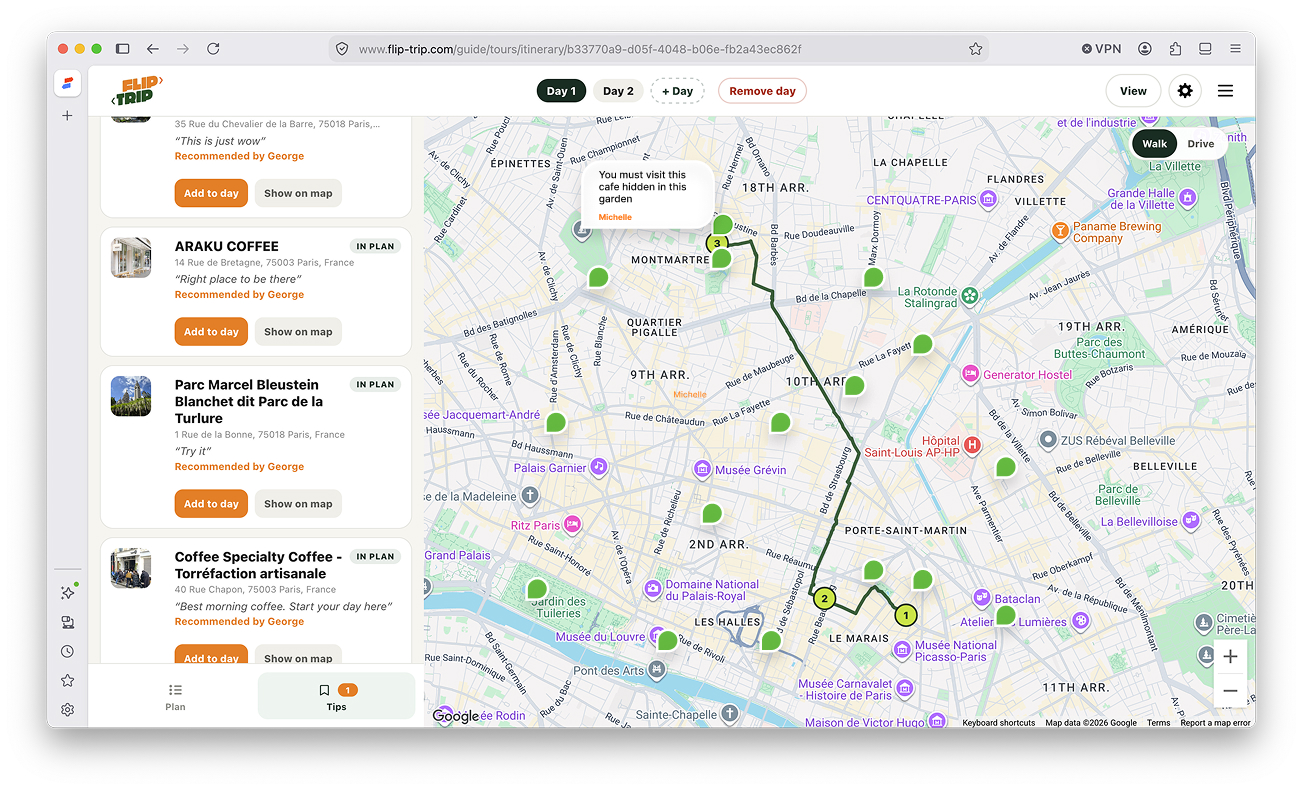
That’s the whole loop: city → link → route. You can also build solo first and invite tips later. Same trip either way.
Why bother asking?
Because the best spots rarely announce themselves as “best.” They’re the bakery your friend goes to on Sundays. The viewpoint that only works at 7pm. The bar with the chalkboard list.
Search engines optimize for popularity. Friends — and communities you trust — optimize for you. That difference shows up on the ground, usually around lunch on day two, when you’re not standing in a queue you didn’t need.
We’re not anti-guides or anti-research. You’re still free to sketch days yourself. Mix tips in as they arrive. The point is the plan should feel like yours, not like a consensus of strangers.
Share it — or make it public
When the route feels ready, you can always send friends a link to your trip so they can follow along.
What’s even better: you can publish the trip. You create from scratch, collect recommendations, build the route, write descriptions, add photos from the journey — then flip it public. It shows up on FlipTrip so other travelers can walk the same path you figured out the hard way.
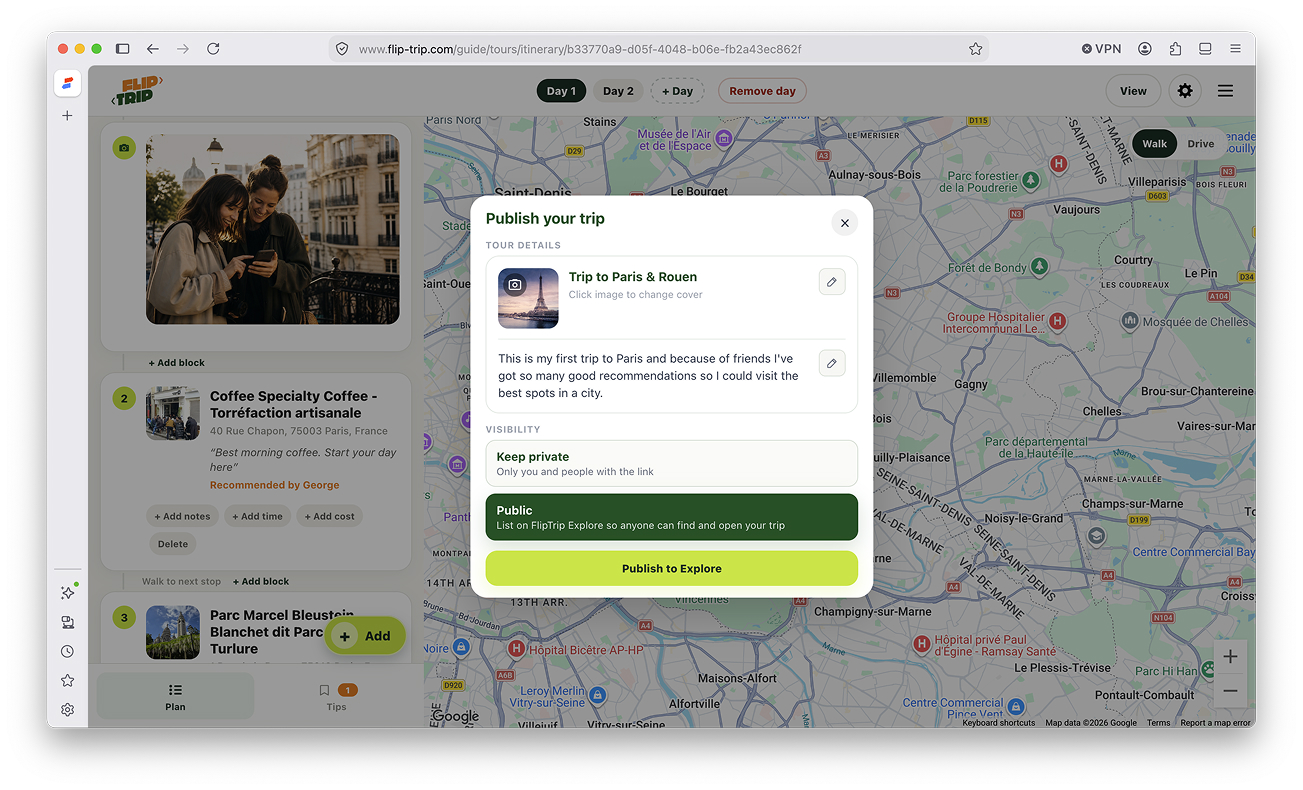
Private share for your circle. Public publish when you’re ready for strangers to benefit from the same map.
Try it once
Pick a city you’re actually going to — or one you’d go to if the tickets were cheap. Get the link. Share it widely with people who know that place. See what comes back.
Start on FlipTrip — tell it where you’re going and ask for tips. Or create a trip from scratch. First trip is free. Friends don’t need an account.
Desktop is the clearest place to plan; mobile web works when you’re on the move; the iPhone app is coming soon.
If you want the pricing details later, they’re on the pricing page. If you’re still deciding whether to ask friends or sketch the days yourself, you can switch between Tips and Plan anytime inside the same trip.
And if this way of planning already sounds like what you do in WhatsApp — good. You’re not learning a new personality. You’re just stopping the good tips from disappearing into the chat.